Our blog
The latest news from our team at Clever Dynamics

Boost Your Report Layouts in Microsoft Dynamics 365 Business Central with Clever Comments
Are your users accidentally missing important information on your internal and external documents in Business Central? If so, our app, Clever Comments, is perfect for you!
What is Clever Comments?
Our app, Clever Comments, plugs straight into Business Central and automatically adds customer, item or vendor-specific text to internal and external documents, keeping information consistent without manual updates.
Did you know that you can use Clever Comments from Clever Dynamics to add text onto both internal documents, such as pick lists, and external documents, such as sales order confirmations? In this blog post, we will look at how we can get this setup completed.
Firstly, although any document can be extended to include additional comments, only the following reports can be used currently to add comments without creating report extensions:
• 1302 – Standard Sales – Pro Forma Invoice
• 1303 – Standard Sales – Draft Invoice
• 1304 – Standard Sales – Quote
• 1305 – Standard Sales – Order Confirmation
• 1306 – Standard Sales – Invoice
• 1307 – Standard Sales – Credit Memo
• 1308 – Standard Sales – Shipment
• 1309 – Standard Sales – Return Receipt
• 1322 – Standard Purchase – Order
• 7301 – Movement List
• 5751 – Put-Away List
• 5752 – Picking List
• 99000762 – Prod. Order – Job Card
How do I add comments to my documents in Business Central?
Now that we know which documents the comments can be added to, let's walk through how to add comments. In this example, I will be adding a comment onto the Sales Order Confirmation document.
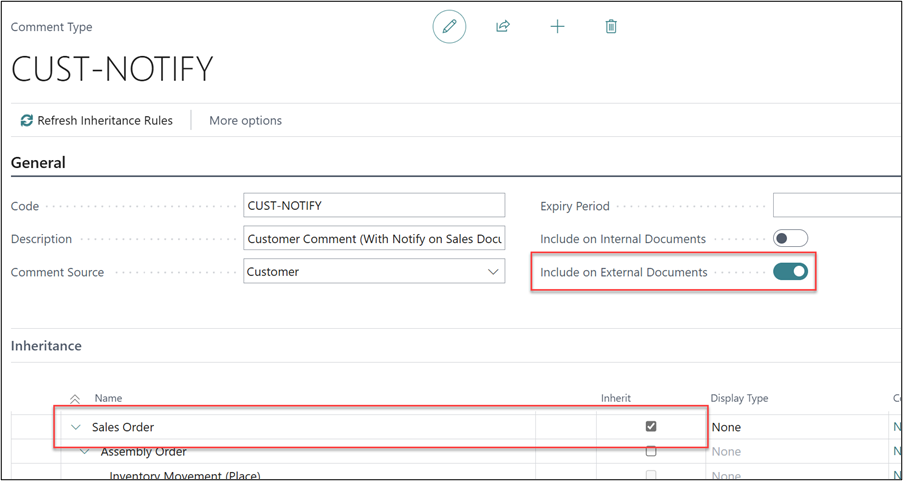
First, on the Comment Types setup, make sure to select both ‘Include on External Documents’ (since the Sales Order Confirmation is an outward-facing document) and the ‘Inherit’ flag on the Sales Order line.
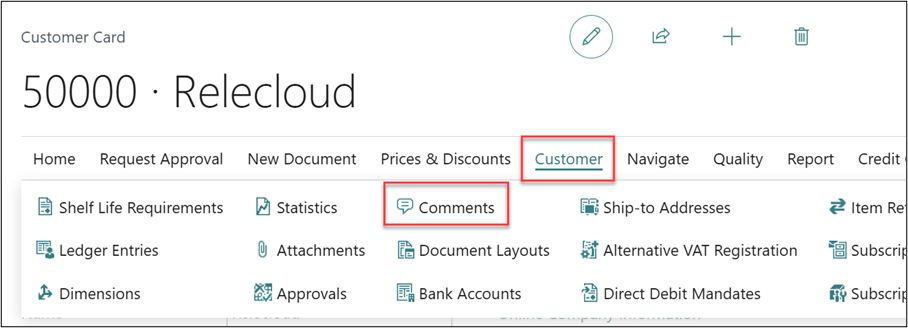
With the Comment Type setup, now navigate to the Customer for whom you’d like to add the comment against, and from the ribbon select Customer > Comments.
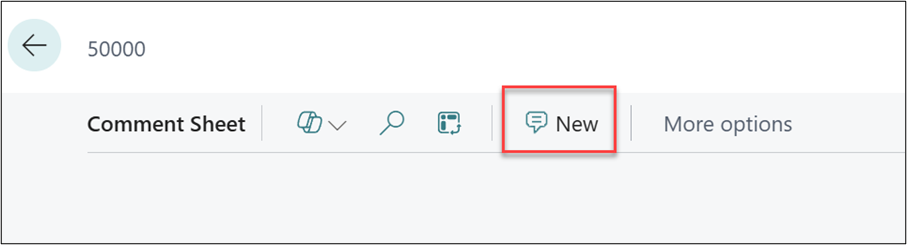
Then select New to create a new comment.
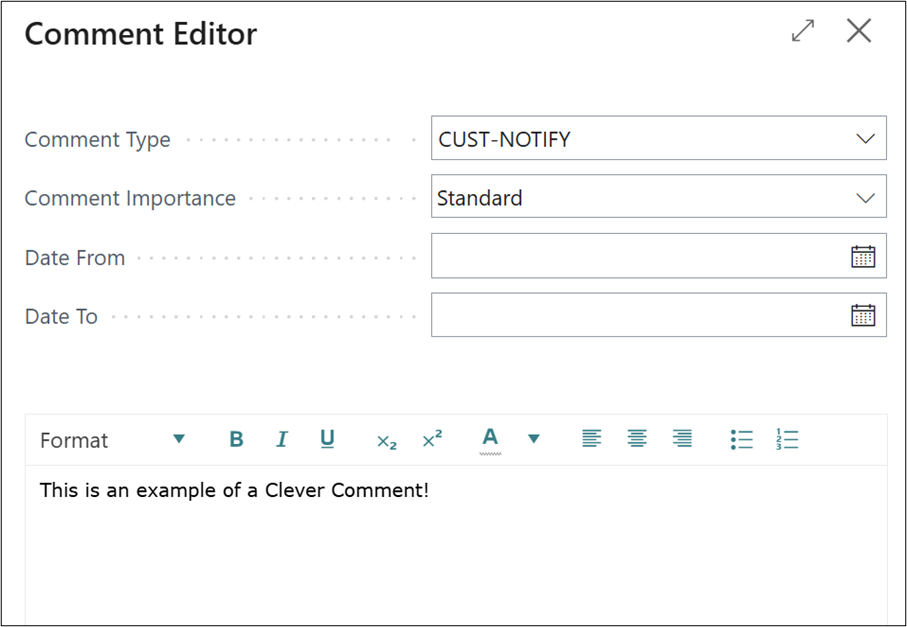
This will open the Comment Editor, within this page, populate the Comment Type we created in the previous step and then populate the text box.
With the comment created, I have raised a Sales Order for the Customer, as this is where the comment will be inherited.
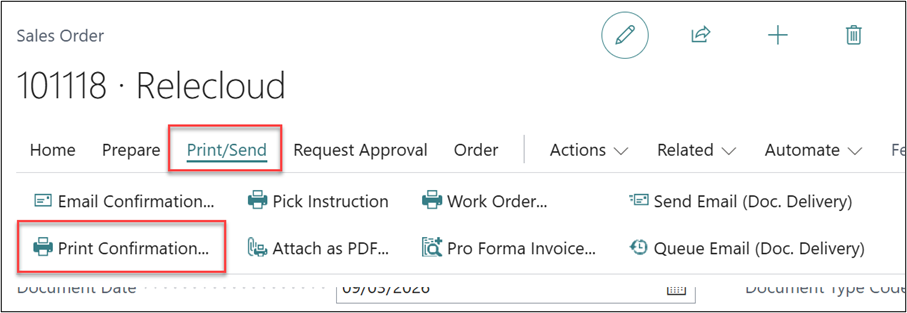
Next, to view the report, select Print/Send > Print Confirmation from the menu.
Before printing you must ensure that the Report Layout is correct and includes the comments.
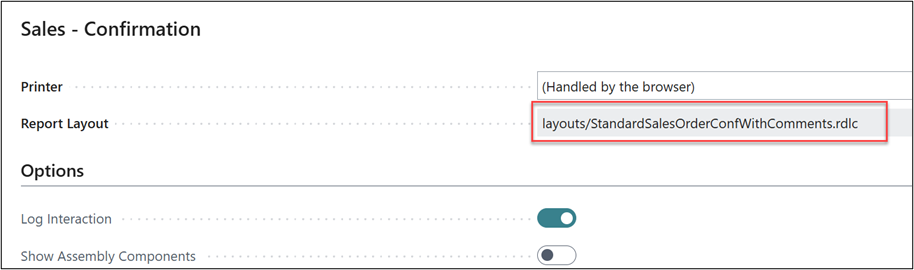
Note the ‘WithComments’ in the Report Layout name.
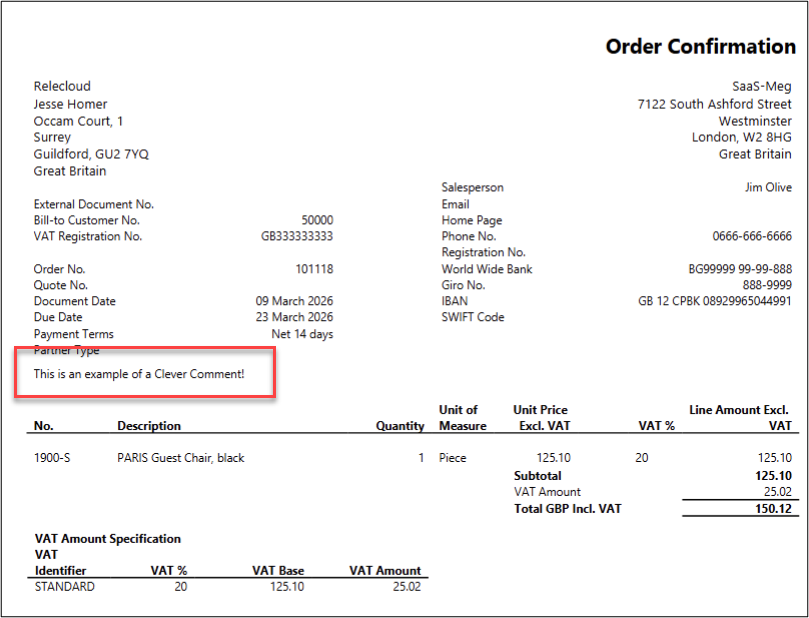
As we can see, the Comment we configured against the Customer has been inherited onto the Sales Order Confirmation.
Please note that Microsoft Word layouts have limitations and some formatting features will not be supported. Specifically, comments placed on Word layouts cannot contain bold, italic, underlined, coloured text or subscript characters. These formats will be removed.
As you can see, it is very easy to use Clever Comments to inherit customer/item/vendor-specific information onto the report layouts.
Watch out for more tips like this on our Blog and if you have any questions for us, please get in touch
COMPILED ON