
Sending different attachments per customers / vendors
Clever Document Delivery allows you to easily define additional attachments that should be sent when certain records are processed. For example, send an attachment of your terms and conditions with each invoice or send unpaid invoices with a customer statement or reminder letter.
Attachments are defined in the Attachments tab of the Doc Delivery Document Type card. Attachments can be created either from a report or a static attachment that has been uploaded to the Doc. Delivery Attachments page.
A question that customers sometimes have – and which is the subject of this post – is how to config different attachments to appear per customer or vendor.
Let’s imagine that we have two different attachments that must be sent out with sales invoices. Only one of the attachments should be sent with each invoice and we need to decide per customer which it is.
Upload Attachments
First, we need to upload those attachments to the Doc. Delivery Attachments page. Typically they will be PDF files but many other file types are supported.

I have given the attachments the codes one and two in my example.
Create a Document Type Field
Now to add an attachment to the sales invoice document type. First, we need a way to decide which of these two we are going to send for each customer. We can use the Custom Values features in Clever Document Delivery for this.
Create a new line in the Fields section of the Doc. Delivery Document Type page. I’ve called mine ADDATTACH. Click on Manage, Field Lines to configure this field.
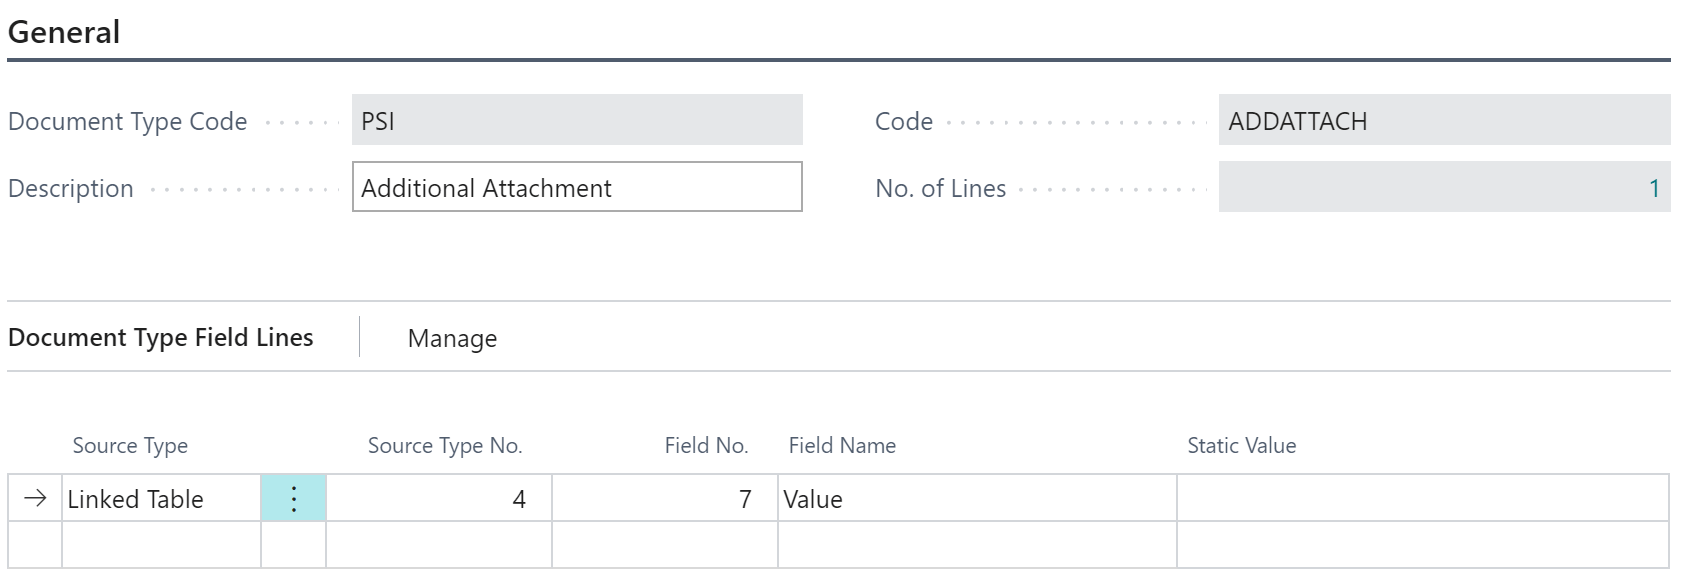
The Document Type Field Lines determine how the value of this field will be calculated when a record is submitted to Clever Document Delivery for processing. In this case I will take the value from the Custom Values table.
Create a Document Type Attachment
Next, create a new record in the Attachments table. I’ve selected an Attachment Type of Attachment to indicate that I’m going to attach a file from the Doc. Delivery Attachments page.
I must tell the system which attachment I want to attach by populating the Attachment Code. I could select ONE or TWO from the dropdown – but that would always attach the selected file.
Instead I will enter [[ADDATTACH]]. This tells the system to use the value of my ADDATTACH field – added above. This placeholder will be replaced with the value that has been calculated for the ADDATTACH field for each invoice that is processed.

I am also using the [[ADDATTACH]] placeholder for the Attachment Name. When the file is attached to the email it will be named either “Attachment ONE.pdf” or “Attachment TWO.pdf” as appropriate.
Enter Custom Values
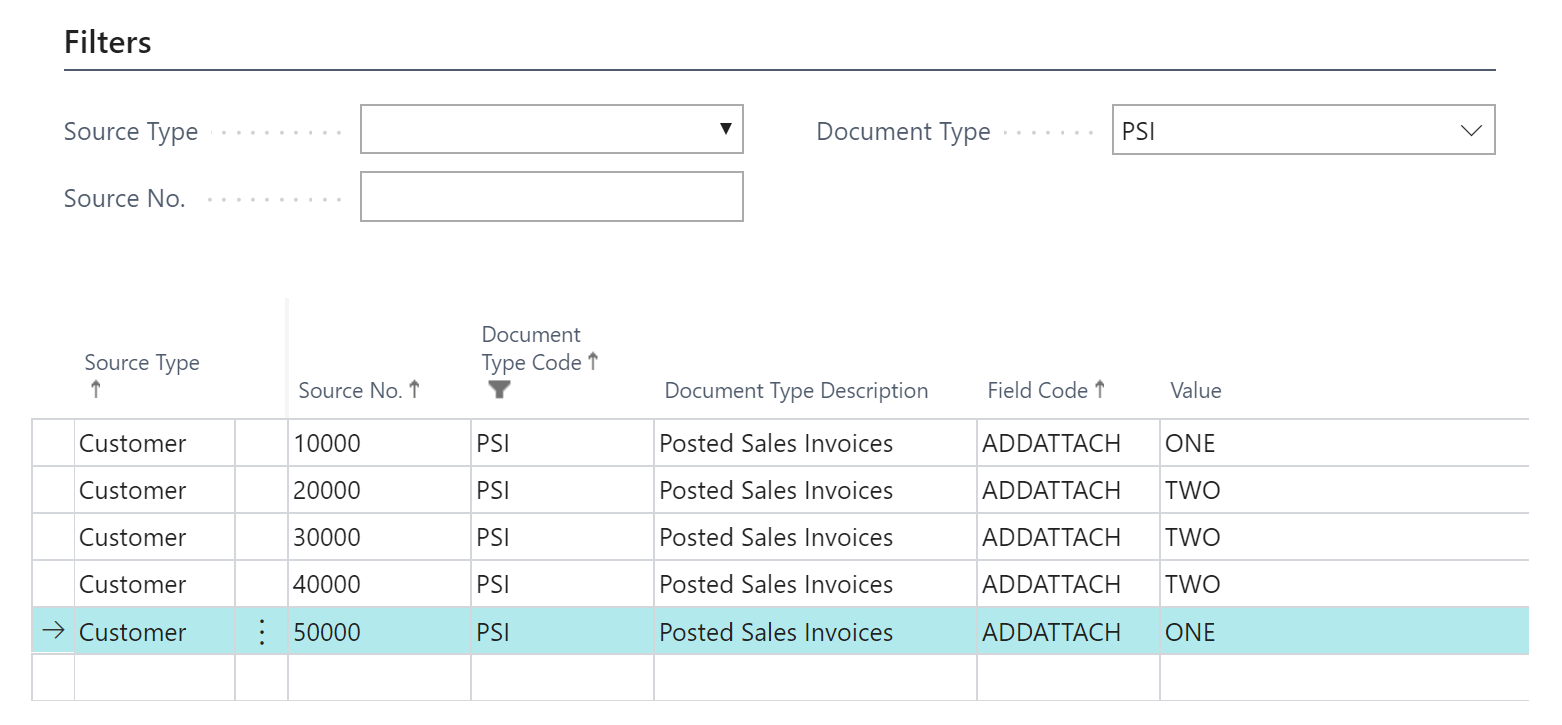
Finally, we can enter the required value for each customer in the Custom Value window. Click on Custom Value at the top of the Doc. Delivery Document Type page.
Create a record for each customer that must receive one of these attachments, select ADDATTACH as the Field Code and enter either ONE or TWO as the Value.
Test
To test I am going to make sure that Preview before Sending is turned on. Navigate to the Posted Sales Invoices page, highlight a record and use the Send Email action. Check the Attachments table at the bottom of the Email Preview page to ensure that the correct attachment has been used.

COMPILED ON